Solva's siggys
0

Solva-tan wrote...
Shia wrote...
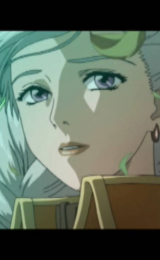
I would like to request an Agrias sig. o3oFrom FF Tactics?
Yes. My waifu from FFT. Rawr. Win. XD


0

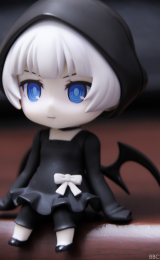
Ok figured out what I want. I want one of Yomi from Ga-rei. If you can't find a good picture then my second choice would be Kiri Komori from Sayonara Zetsubo Sensei.


1
Although I am a bit of a noobie here at Fakku, I've got some tips and tricks to pass around.
1. Beware of the blending modes. By blending modes, I am referring to double clicking a layer to apply Fx modes to it. While using blending modes affectively can give you that certain special look you're going for, slapping on a drop shadow and a bevel and emboss on text is something much too over saturated in the graphics community. Nothing really screams out to me in your images, though, so that's good. (Graphics pet peeve - w -;; )
2. Play around with specialty tools. Two of my favorite tools for Photoshop happen to be the pen and history brush tool. While the pen tool is plenty better in Illustrator, it can be used to make some interesting shapes and close cut selections. Once you learn how to make the right curve with the pen tool, it beats out anything you could do with a lasso or magic wand. The history brush tool can be quite effective for specialty effects. My suggestion for the history brush is to apply a filter or effect unto a layer, then use the history brush tool to "heal" certain arenas where the manipulation was too heavy. I most use this tool when editing actual skin, I first Gaussian blur the whole image to a thick blur, then I use the history brush tool to heal the edges were clarity is needed, but I keep the blurred section to fix aberrations in the skin.
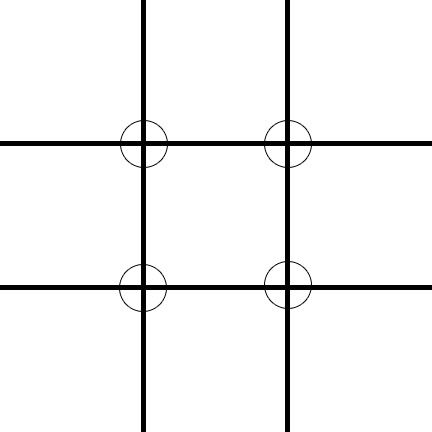
3. Practice the 3/4ths rule. The 3/4ths rule is pretty simple, but it is a general rule of thumb for eye grabbing in composition. The 3/4ths is simply when you take an image and slice it into 3 sections horizontally and vertically. The focus of the image should be on one of the four inner corners:
4. Trust your artistic gut when you can, follow the clients requests otherwise. When I like to do an image, I'll mock up two or three concepts for the client to view and critique. This not only lets you play with some ideas for the image, but it gets the clients creativity come into play as well. If you get inspired by something, get to a computer and try to get it down in pixels (or paper) just by how you feel it should be there. Those spur of the moment inspirations can sometimes turn into your best pieces of work and the tricks you use to make that image can be added to your arsenal of stuff to do in the future.
I like your stuff, keep at it. =D
1. Beware of the blending modes. By blending modes, I am referring to double clicking a layer to apply Fx modes to it. While using blending modes affectively can give you that certain special look you're going for, slapping on a drop shadow and a bevel and emboss on text is something much too over saturated in the graphics community. Nothing really screams out to me in your images, though, so that's good. (Graphics pet peeve - w -;; )
2. Play around with specialty tools. Two of my favorite tools for Photoshop happen to be the pen and history brush tool. While the pen tool is plenty better in Illustrator, it can be used to make some interesting shapes and close cut selections. Once you learn how to make the right curve with the pen tool, it beats out anything you could do with a lasso or magic wand. The history brush tool can be quite effective for specialty effects. My suggestion for the history brush is to apply a filter or effect unto a layer, then use the history brush tool to "heal" certain arenas where the manipulation was too heavy. I most use this tool when editing actual skin, I first Gaussian blur the whole image to a thick blur, then I use the history brush tool to heal the edges were clarity is needed, but I keep the blurred section to fix aberrations in the skin.
3. Practice the 3/4ths rule. The 3/4ths rule is pretty simple, but it is a general rule of thumb for eye grabbing in composition. The 3/4ths is simply when you take an image and slice it into 3 sections horizontally and vertically. The focus of the image should be on one of the four inner corners:
4. Trust your artistic gut when you can, follow the clients requests otherwise. When I like to do an image, I'll mock up two or three concepts for the client to view and critique. This not only lets you play with some ideas for the image, but it gets the clients creativity come into play as well. If you get inspired by something, get to a computer and try to get it down in pixels (or paper) just by how you feel it should be there. Those spur of the moment inspirations can sometimes turn into your best pieces of work and the tricks you use to make that image can be added to your arsenal of stuff to do in the future.
I like your stuff, keep at it. =D